
How to Install High Performance Faucets
Table of Contents
- What You'll Need: Faucet Installation Tools List
- Verify Compatibility Before You Start
- Step 1: Turn Off the Water Supply
- Step 2: Disconnect Old Supply Lines and Remove the Existing Faucet
- Step 3: Clean the Sink Surface and Install the New Faucet Assembly
- Step 4: Connect Supply Lines and Test for Leaks
- Best Practices for Plumbing Fixture Installation and High-Performance Maintenance
- How Long Does It Take to Install a Kitchen Faucet
- Frequently Asked Questions
Last Updated: September 2, 2026
What You'll Need: Faucet Installation Tools List
Installing high performance faucets requires the right tools. A basin wrench is essential for accessing tight under-sink spaces to loosen and tighten mounting nuts. An adjustable wrench handles supply line connections. Plumber's putty seals the faucet base to the sink, preventing water seepage. Teflon tape wraps around threaded connections to ensure watertight seals.
Gather two pipe wrenches (one to hold, one to turn), a flashlight for visibility, a bucket or towels to catch water, a putty knife to remove old putty, and caulk with a caulking gun for a professional finish. For high-performance faucets, check the manufacturer's specifications for stabilizer plates or escutcheon rings requiring precision alignment. Determine whether your faucet uses compression fittings or push-to-connect flexible hoses. Have needle-nose pliers available for aerator adjustments.
Before starting, confirm correct supply line connections for your sink configuration. Center-set, widespread, and single-hole installations each require different approaches.
Verify Compatibility Before You Start
This step separates successful installations from costly mistakes. High-performance faucets often have specific requirements that don't match every sink or plumbing configuration.
Identify your sink type and hole spacing. Center-set faucets fit in a single 4-inch hole. Widespread models need three separate holes spaced 8 inches apart. Single-hole installations use a deck plate to cover extra holes. Forcing an incompatible faucet risks cracking the sink.
Examine your existing water supply lines. Are they 1/2-inch IPS (Iron Pipe Size) connections, the industry standard? Check the shut-off valves under the sink. If they're corroded, stuck, or leaking, replace them now. High-performance models have tighter tolerances and lower flow rates, making water pressure critical.
Measure the distance from the wall to where the spout will reach. For widespread faucets, confirm handles won't hit the backsplash. Check whether the p-trap or drain flange sits too high, limiting workspace.
Verify your water pressure at the shut-off valve using a pressure gauge. Most faucets perform optimally between 40 and 80 PSI (nsf.org). Federal standards limit kitchen faucets to 2.2 GPM, but some high-performance models deliver 1.8 GPM or less while maintaining strong pressure through advanced aerator design. If your home has a pressure reducing valve set too low, a 1.8 GPM faucet may feel weak.
Confirm that the faucet's material matches your aesthetic and durability needs. Solid brass construction resists corrosion better than plated alternatives, especially in humid bathrooms (astm.org). If you're upgrading to a high-performance model like the Kingston Brass French Country Wall Mount Vessel Sink Faucet, verify that the 1.2 GPM flow rate suits your usage.

Step 1: Turn Off the Water Supply
Locate the shut-off valves under your sink on the hot and cold supply lines. Turn both valves clockwise until they stop. Don't force them; if a valve won't budge after moderate pressure, it's corroded and needs replacement.
Once closed, turn on the faucet to release remaining water pressure. Open cabinet doors for visibility and airflow. Place towels or a bucket underneath to catch drips.
If you can't locate shut-off valves under the sink, find the main water shut-off for your home, typically in the basement, crawlspace, or outside near the foundation.
Step 2: Disconnect Old Supply Lines and Remove the Existing Faucet
The mounting nut holding your old faucet sits underneath the sink in a cramped space where a standard wrench won't fit. Use the basin wrench by sliding it up behind the mounting nut. The wrench head grips the nut when you turn the handle. Work it back and forth in ratcheting motions until loose enough to unscrew by hand. Disconnect the supply lines from the old faucet's tailpieces using an adjustable wrench.
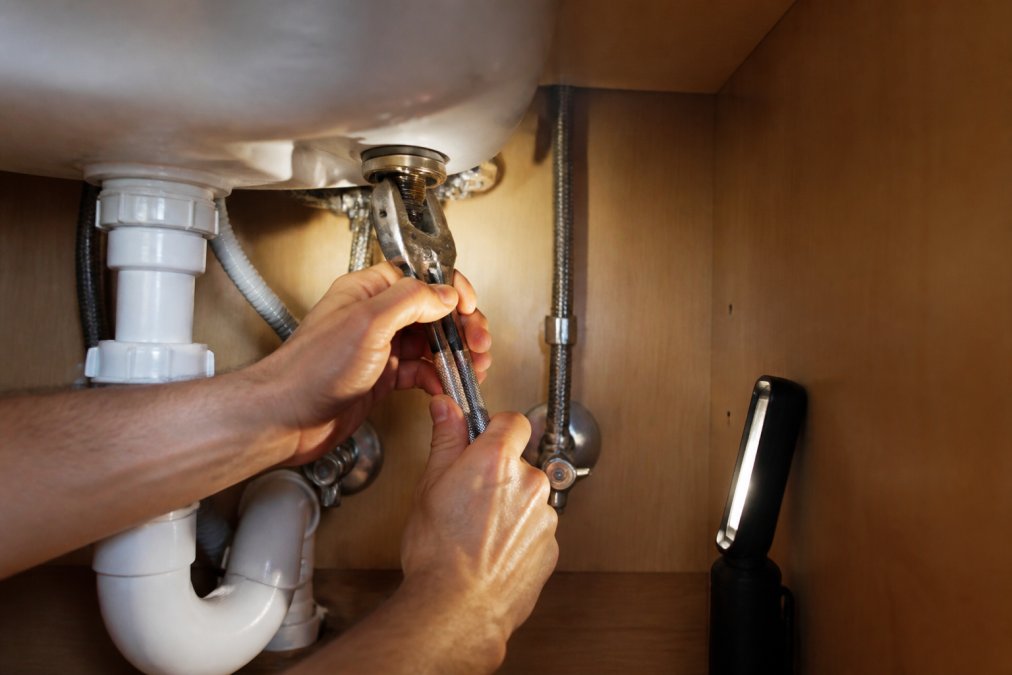
Lift the old faucet out of the sink. Some faucets have a deck plate that needs to come out first. If the faucet is stuck, apply penetrating oil around the base and wait 15 minutes.
Once removed, scrape away all old plumber's putty or caulk using a putty knife. Old putty prevents a proper seal and can trap water underneath, leading to mold and rot. For widespread faucets with three holes, remove the deck plate carefully and clean each hole thoroughly.
Step 3: Clean the Sink Surface and Install the New Faucet Assembly
Wipe the sink area with a damp cloth to remove debris and old putty residue. Dry it completely. Read your new faucet's installation instructions before proceeding. High-performance models often include gaskets or o-rings requiring correct positioning.
Apply a thin bead of plumber's putty around the base of the faucet where it meets the sink. For some premium faucets, a rubber gasket replaces putty; follow manufacturer instructions exactly.
Lower the faucet into the hole, ensuring it sits straight and level. The spout should point directly into the sink basin. Slide the stabilizer plate underneath if included; this distributes pressure and prevents cracking, especially important for delicate vessel sinks.
Thread the mounting nut onto the faucet tailpiece from underneath. Use the basin wrench to tighten firmly, but don't over-tighten; excessive force can strip threads or crack the sink. Wipe away excess putty with a damp cloth. Allow putty to cure for the time specified in instructions, typically 24 hours, before running water.
Step 4: Connect Supply Lines and Test for Leaks
Attach the hot and cold supply lines to the faucet's tailpieces underneath the sink. Most high-performance faucets use compression fittings or push-to-connect flexible hoses. If lines are old or kinked, replace them with new flexible hoses rated for your water pressure.
For compression fittings, wrap the threaded connection with three to four layers of teflon tape, wrapping clockwise. Hand-tighten the fitting first, then use an adjustable wrench to snug it another quarter-turn. Don't over-tighten; compression fittings create a seal through pressure, not brute force.
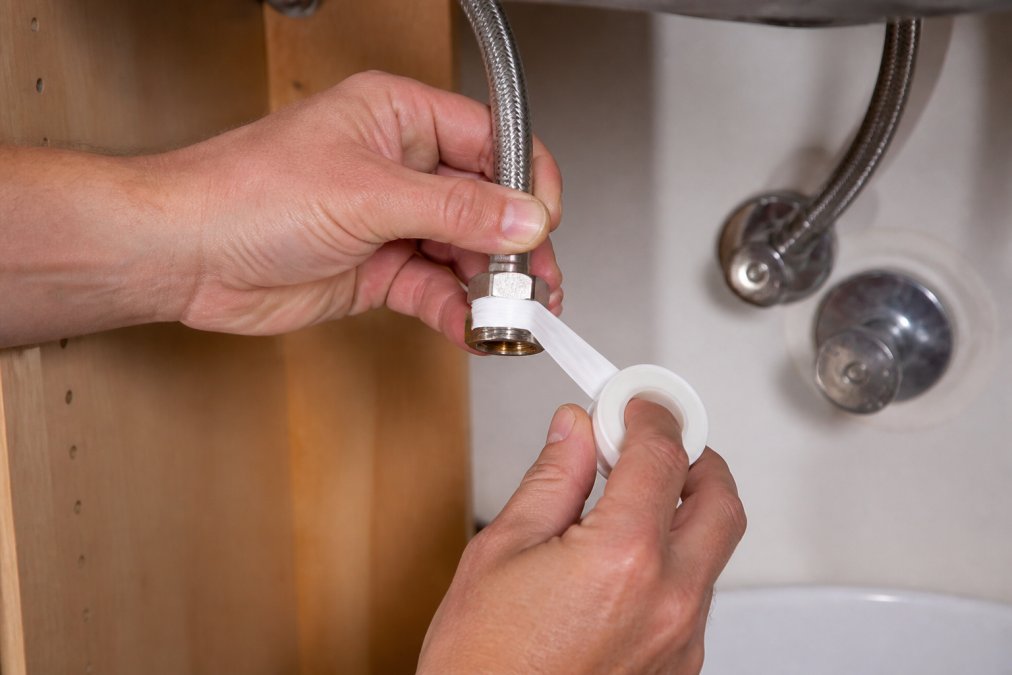
Reconnect supply lines to shut-off valves using teflon tape on threaded connections. Turn the shut-off valves back on slowly. Watch for drips at every connection point. Small drips often mean the connection needs another quarter-turn. Let water run for 30 seconds to flush debris.
Test the faucet handle for smooth movement from off to full hot and cold. Check the aerator for even water flow without sputtering. If pressure seems weak, the aerator may be clogged; remove, rinse, and reinstall it.
Leave cabinet doors open for at least an hour while monitoring for leaks. Check again after 24 hours. If you see drips, tighten the connection slightly.
Best Practices for Plumbing Fixture Installation and High-Performance Maintenance
Installing high-performance faucets correctly is just the beginning. Proper maintenance determines whether they deliver reliable service for years.
Use a soft cloth to clean the faucet surface, avoiding abrasive scrubbers that scratch the finish. For mineral deposits from hard water, soak a cloth in white vinegar and wrap it around the aerator for 30 minutes, then rinse. Never use bleach or harsh chemicals on brass or stainless steel finishes.
If you notice reduced flow after a few months, the aerator likely has mineral buildup. Unscrew it, soak in vinegar, and clean the screen with an old toothbrush.
Check shut-off valves annually by turning them off and back on to ensure they move freely. A valve that sticks or doesn't seal completely will fail when needed. If difficult to operate, apply penetrating oil and work it gently. If it still won't budge, replace it.
Monitor water pressure regularly. If flow suddenly drops, the issue is usually mineral buildup in the aerator or a failing shut-off valve. If pressure increases dramatically, check whether a pressure reducing valve has failed; high pressure damages faucet seals and causes premature leaks.
Keep the under-sink space organized. Coiled supply lines and cluttered storage make it difficult to spot leaks early. For high-performance faucets like the Miseno MNO194 CP Floor Mounted Tub Filler, periodic maintenance of the diverter mechanism ensures smooth operation.

Document your faucet's warranty and keep the installation guide accessible. Most high-performance models include a limited lifetime warranty covering defects in materials and workmanship (the FTC).
How Long Does It Take to Install a Kitchen Faucet
Most homeowners complete a straightforward faucet installation in 45 minutes to 90 minutes. Replacing an old faucet with the same configuration takes the shorter end of that range. Upgrading to a different faucet type, such as switching from center-set to widespread, adds 30 to 45 minutes for adjusting hole spacing or installing a new deck plate.
First-time installers typically need 90 minutes to two hours. Factor in additional time if you encounter corroded shut-off valves needing replacement, add 30 to 45 minutes. If your old faucet is stuck or putty is stubborn, add 15 to 30 minutes for scraping and cleanup.
The time investment pays off. A proper installation prevents water damage, eliminates drips, and ensures your high-performance faucet performs as designed.
Installing high-performance faucets transforms your kitchen or bathroom with reliable performance and modern aesthetics. The process demands attention to detail, especially compatibility verification, proper sealing with teflon tape and plumber's putty, and thorough leak testing. Crestpoint Home offers a curated selection of premium faucets, including models like the Signature Hardware 948664-LV Provincetown Floor Mounted Tub Filler and the Neptune Tub Filler with Shower Attachment, each engineered for durability and precise water control. Our dedicated support team is available via phone, email, or live chat to answer questions about compatibility, installation, or maintenance. Get started with Crestpoint Home and enjoy the confidence that comes with premium fixtures installed correctly.

Frequently Asked Questions
What are the most common faucet installation mistakes?
The most common mistakes include over-tightening mounting nuts (which can crack the sink), forgetting to shut off the water supply before disconnecting lines, and failing to apply teflon tape or plumber's putty properly, leading to leaks. Many homeowners also skip the leak detection step, only discovering problems after walls are finished. Not securing the faucet body adequately before tightening connections can cause wobbling. Take time to hand-tighten first, then use your wrench with moderate pressure.
Can I install a high-performance faucet myself without hiring a plumber?
Yes, most homeowners can install a high-performance faucet with basic tools and patience. The process takes 1-2 hours for kitchen faucets and 2-3 hours for widespread or floor-mounted models. You'll need a basin wrench, adjustable wrench, teflon tape, and plumber's putty. The key is following the manufacturer's instructions carefully, especially for compression fittings and o-ring seals. If your home has unusual plumbing or you encounter complications, consulting a professional is wise, but standard installations are very manageable for DIY.
How much does professional faucet installation cost?
Professional installation typically costs $150-$300 for a standard kitchen or bathroom faucet, depending on your location and plumber rates. High-performance or specialized fixtures may run $200-$400 if additional modifications are needed. Some plumbers charge hourly rates ($75-$150 per hour) instead. Always request a quote before work begins. Many homeowners find the DIY approach saves money, especially for straightforward installations.
What makes a faucet 'high-performance' and how does that affect installation?
High-performance faucets feature precision flow-rate controls (typically 1.2-1.8 GPM), ceramic disc cartridges for durability, and advanced shut-off valves that reduce water pressure spikes. Installation differs slightly because these fixtures often require more careful handling of o-rings and gaskets to maintain their performance seals. You may need to pay closer attention to water pressure settings and ensure compression fittings are sealed perfectly with teflon tape. The payoff is superior leak resistance, longer lifespan, and consistent water delivery, making the extra care during installation worthwhile.
This article was written using GrandRanker